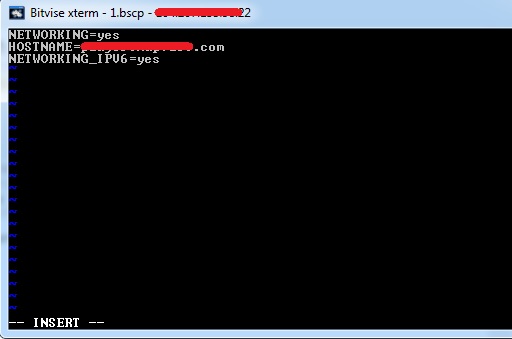
Step 1: edit file /etc/sysconfig/network
First, view the current content of this file
[root@vultr ~]# cat /etc/sysconfig/network
NETWORKING=yes
HOSTNAME=vultr.guest
Now, append following line:
NETWORKING_IPV6=yes
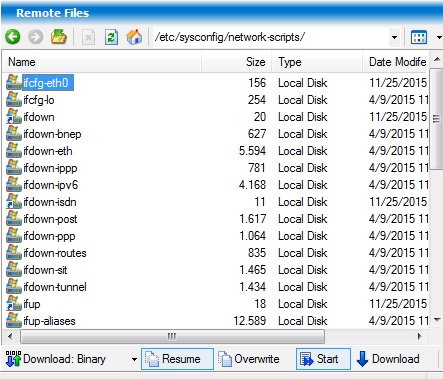
Step 2: Go to folder /etc/sysconfig/network-scripts/ and find the first network config file:
we can find the file /etc/sysconfig/network-scripts/ifcfg-eth0
View the current content of this file:
[root@vultr ~]# cat /etc/sysconfig/network-scripts/ifcfg-eth0
DEVICE="eth0"
BOOTPROTO="dhcp"
ONBOOT="yes"
TYPE="Ethernet"
NM_CONTROLLED="no"
DNS1=108.61.10.10
IPV6_AUTOCONF=yes
IPV6INIT=yes
#DNS2=2001:19f0:300:1704::6
Add following lines:
IPV6ADDR=2001:19f0:300:1704::6/64
DNS2=2001:19f0:300:1704::6
Update 2018: on CentOS 7: add more line
IPV6_DEFAULTGW=2001:19f0:300:1704::6
Note: replace by your Ipv6 address range
The full example:
DEVICE=eth0
ONBOOT=yes
BOOTPROTO=static
IPADDR=104.207.155.98
NETMASK=255.255.254.0
GATEWAY=104.207.154.1
DNS1=108.61.10.10

IPV6INIT=yes
IPV6ADDR="2001:19f0:6000:9bee:5400:00ff:fe1e:08eb/64"
IPV6_AUTOCONF="yes"
DNS2=2001:19f0:300:1704::6
Step 3: restart networking
service network restart
[root@vultr ~]# service network restart
Shutting down interface eth0:                              [  OK  ]
Shutting down loopback interface:                          [  OK  ]
Bringing up loopback interface:                            [  OK  ]
Bringing up interface eth0:
Determining IP information for eth0... done.
                                                           [  OK  ]
Now you can check the configuration by ping any ipv6 address
ping6 ipv6.google.com
[root@tutorialspots ~]# ping6 ipv6.google.com
PING ipv6.google.com(par03s15-in-x0e.1e100.net) 56 data bytes
64 bytes from par03s15-in-x0e.1e100.net: icmp_seq=1 ttl=57 time=4.80 ms
64 bytes from par03s15-in-x0e.1e100.net: icmp_seq=2 ttl=57 time=4.82 ms
64 bytes from par03s15-in-x0e.1e100.net: icmp_seq=3 ttl=57 time=4.84 ms
64 bytes from par03s15-in-x0e.1e100.net: icmp_seq=4 ttl=57 time=4.82 ms
64 bytes from par03s15-in-x0e.1e100.net: icmp_seq=5 ttl=57 time=4.83 ms


