
What is Vue.js?
Vue is a progressive framework for building user interfaces. Unlike other monolithic frameworks, Vue is designed from the ground up to be incrementally adoptable. The core library is focused on the view layer only, and is easy to pick up and integrate with other libraries or existing projects. On the other hand, Vue is also perfectly capable of powering sophisticated Single-Page Applications when used in combination with modern tooling and supporting libraries.
Getting Started
Installation:
http://tutorialspots.com/vue-3-tutorial-lesson-1-installation-6171.htm
Declarative Rendering
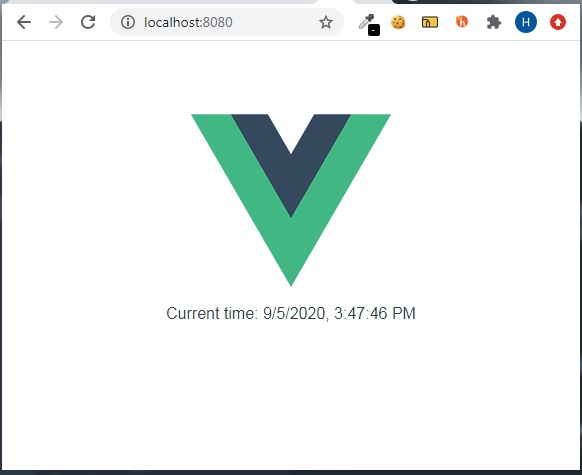
At the core of Vue.js is a system that enables us to declaratively render data to the DOM using straightforward template syntax:
Example 1:
main.ts
import { createApp } from 'vue'
import App from './App.vue'

createApp(App).mount('#app')
App.vue
<template>
  <div id="app">
    <img alt="Vue logo" src="./assets/logo.png">
    <div>Current time: {{ datetime }}</div>
  </div>
</template>

<script lang="ts">
import { Vue } from 'vue-class-component';

export default class App extends Vue {
  data() {
    return {
      datetime: new Date().toLocaleString()
    }
  }
}
</script>

<style>
#app {
  font-family: Avenir, Helvetica, Arial, sans-serif;
  -webkit-font-smoothing: antialiased;
  -moz-osx-font-smoothing: grayscale;
  text-align: center;
  color: #2c3e50;
  margin-top: 60px;
}
</style>
Use event on mounted and change data:
Example 2:
App.vue
<template>
  <div id="app">
    <img alt="Vue logo" src="./assets/logo.png">
    <div>Current time: {{ datetime }}</div>
  </div>
</template>

<script lang="ts">
import { Vue } from 'vue-class-component';

export default class App extends Vue {
  datetime!:string
  data() {
    return {
      datetime: new Date().toLocaleString()
    }
  }
  mounted() {
    setInterval(() => {
      this.datetime = new Date().toLocaleString()
    }, 1000)
  }
}
</script>

<style>
#app {
  font-family: Avenir, Helvetica, Arial, sans-serif;
  -webkit-font-smoothing: antialiased;
  -moz-osx-font-smoothing: grayscale;
  text-align: center;
  color: #2c3e50;
  margin-top: 60px;
}
</style>
Use directive v-bind to bind element attributes
Syntax:
<tagName v-bind:attribute="data"...>
or
<tagName :attribute="data"...>
Example 3:
App.vue
<template>
  <div id="app">
    <img alt="Vue logo" src="./assets/logo.png">
    <div v-bind:title="datetime">Current time: {{ datetime }}</div>
  </div>
</template>

<script lang="ts">
import { Vue } from 'vue-class-component';

export default class App extends Vue {
  data() {
    return {
      datetime: new Date().toLocaleString()
    }
  }
}
</script>

<style>
#app {
  font-family: Avenir, Helvetica, Arial, sans-serif;
  -webkit-font-smoothing: antialiased;
  -moz-osx-font-smoothing: grayscale;
  text-align: center;
  color: #2c3e50;
  margin-top: 60px;
}
</style>
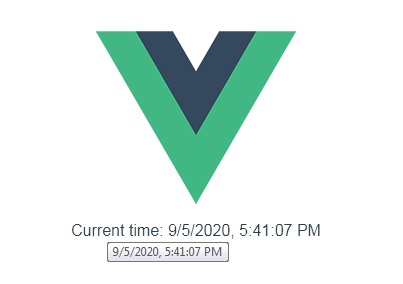
Here we’re encountering something new. The v-bind attribute you’re seeing is called a directive. Directives are prefixed with v- to indicate that they are special attributes provided by Vue, and as you may have guessed, they apply special reactive behavior to the rendered DOM. Here we are basically saying “keep this element’s title attribute up-to-date with the datetime property on the current active instance.”
Handling User Input
To let users interact with your app, we can use the v-on directive to attach event listeners that invoke methods on our instances:
Syntax:
<tagName v-on:eventName="eventMethod"...>
or
<tagName @eventName="eventMethod"...>
Example 4:
App.vue
<template>
  <div id="app">
    <img alt="Vue logo" src="./assets/logo.png">
    <p>{{ counter }}</p>
    <button v-on:click="increase">Increase</button>
  </div>
</template>

<script lang="ts">
import { Vue } from 'vue-class-component';

export default class App extends Vue {
  counter:number=0

  increase(){
    this.counter=this.counter + 1
  }

}
</script>

<style>
#app {
  font-family: Avenir, Helvetica, Arial, sans-serif;
  -webkit-font-smoothing: antialiased;
  -moz-osx-font-smoothing: grayscale;
  text-align: center;
  color: #2c3e50;
  margin-top: 60px;
}
</style>
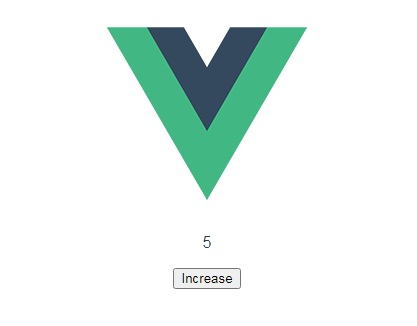
Note that in this method we update the state of our app without touching the DOM – all DOM manipulations are handled by Vue, and the code you write is focused on the underlying logic.
Vue also provides the v-model directive that makes two-way binding between form input and app state a breeze:
Example 5: v-model directive
App.vue
<template>
  <div id="app">
    <img alt="Vue logo" src="./assets/logo.png">
    <p>{{ message }}</p>
    <input v-model="message" />
  </div>
</template>

<script lang="ts">
import { Vue } from 'vue-class-component';

export default class App extends Vue {
  message:string = "Tutorialspots.com"
}
</script>

<style>
#app {
  font-family: Avenir, Helvetica, Arial, sans-serif;
  -webkit-font-smoothing: antialiased;
  -moz-osx-font-smoothing: grayscale;
  text-align: center;
  color: #2c3e50;
  margin-top: 60px;
}
</style>

Conditionals and Loops
v-if directive:
Syntax:
<tagName v-if="data"...
Example 6:
App.vue
<template>
  <div id="app">
    <img alt="Vue logo" src="./assets/logo.png">
    <div>
      <p v-if="toggleShow">{{ message }}</p>
      <button v-on:click="toggle">toggle Show</button>
    </div>
  </div>
</template>

<script lang="ts">
import { Vue } from 'vue-class-component';

export default class App extends Vue {
  message:string = "Tutorialspots.com"
  toggleShow=true
  toggle(){
    this.toggleShow = !this.toggleShow
  }
}
</script>

<style>
#app {
  font-family: Avenir, Helvetica, Arial, sans-serif;
  -webkit-font-smoothing: antialiased;
  -moz-osx-font-smoothing: grayscale;
  text-align: center;
  color: #2c3e50;
  margin-top: 60px;
}
</style>

v-for directive:
There are quite a few other directives, each with its own special functionality. For example, the v-for directive can be used to display a list of items using the data from an Array:
Syntax:
<tagName v-for="data in datas" v-bind:key="data"...>
or the shortened version:
<tagName v-for="data in datas" :key="data"...>
If your child data has a numerical value like an id that’s unique to each child, you can also do something like this:
<tagName v-for="data in datas" :key="data.id"...>
Example 7:
App.vue
<template>
  <div id="app">
    <img alt="Vue logo" src="./assets/logo.png">
    <ul>
      <li v-for="city in cities" :key="city">
        {{ city.name }}
      </li>
    </ul>
  </div>
</template>

<script lang="ts">
import { Vue } from 'vue-class-component';

export default class App extends Vue {
  cities = [
    {id:1,name:'Hanoi'},
    {id:2,name:'Bangkok'},
    {id:3,name:'Jakarta'}
  ]

}
</script>

<style>
#app {
  font-family: Avenir, Helvetica, Arial, sans-serif;
  -webkit-font-smoothing: antialiased;
  -moz-osx-font-smoothing: grayscale;
  text-align: center;
  color: #2c3e50;
  margin-top: 60px;
}
#app ul{
  list-style: none;
  padding-inline-start: 0px;
}
</style>

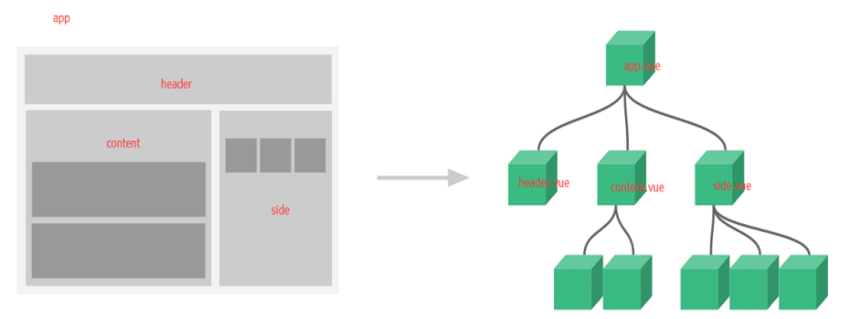
Composing with Components
The component system is another important concept in Vue, because it’s an abstraction that allows us to build large-scale applications composed of small, self-contained, and often reusable components. If we think about it, almost any type of application interface can be abstracted into a tree of components:
Define a new component called example: Use class decorator Options:
import { Options, Vue } from 'vue-class-component'
import example from './components/example.vue'

@Options({
  components: {
    example
  },
})
export default class App extends Vue {
...
Now you can compose it in another component or app’s template:
    <ul>
      <example v-for="city in cities" :key="city.id" :city="city" someData="demo-class"></example>
    </ul>
Define component’s props in file ./components/example.vue
import { Options, Vue } from 'vue-class-component';

@Options({
  props: {
    someData: String,
    city: {}
  }
})
export default class example extends Vue {
...
Now we can pass the city into each repeated component using v-bind:
      <example
        v-for="city in cities"
        :key="city.id"
        :city="city"
        someData="demo-class"
      ></example>
Full example 8:
App.vue
<template>
  <div id="app">
    <img alt="Vue logo" src="./assets/logo.png">
    <ul>
      <example
        v-for="city in cities"
        :key="city.id"
        :city="city"
        someData="demo-class"
      ></example>
    </ul>
  </div>
</template>

<script lang="ts">
import { Options, Vue } from 'vue-class-component'
import example from './components/example.vue'

@Options({
  components: {
    example
  },
})
export default class App extends Vue {
  cities = [
    {id:1,name:'Hanoi'},
    {id:2,name:'Bangkok'},
    {id:3,name:'Jakarta'}
  ]
}
</script>

<style>
#app {
  font-family: Avenir, Helvetica, Arial, sans-serif;
  -webkit-font-smoothing: antialiased;
  -moz-osx-font-smoothing: grayscale;
  text-align: center;
  color: #2c3e50;
  margin-top: 60px;
}
#app ul{
  list-style: none;
  padding-inline-start: 0px;
}
</style>
./components/example.vue
<template>
    <li :class="someData">{{ city.name }}</li>
</template>

<script lang="ts">
import { Options, Vue } from 'vue-class-component';

@Options({
  props: {
    someData: String,
    city: {}
  }
})
export default class example extends Vue {
}
</script>

1 Comment
Vue 3 Tutorial: Lesson 4 – Template Syntax | Free Online Tutorials
(September 7, 2020 - 1:55 am)[…] Vue 3 Tutorial: Lesson 2 – Introduction […]