
We use Ubuntu 22.04
Step 1: install Exim via command line:
apt install exim4
...
Selecting previously unselected package exim4-config.
(Reading database ... 73634 files and directories currently installed.)
Preparing to unpack .../exim4-config_4.95-4ubuntu2.5_all.deb ...
Unpacking exim4-config (4.95-4ubuntu2.5) ...
Selecting previously unselected package exim4-base.
Preparing to unpack .../exim4-base_4.95-4ubuntu2.5_amd64.deb ...
Unpacking exim4-base (4.95-4ubuntu2.5) ...
Selecting previously unselected package libgnutls-dane0:amd64.
Preparing to unpack .../libgnutls-dane0_3.7.3-4ubuntu1.5_amd64.deb ...
Unpacking libgnutls-dane0:amd64 (3.7.3-4ubuntu1.5) ...
Selecting previously unselected package exim4-daemon-light.
Preparing to unpack .../exim4-daemon-light_4.95-4ubuntu2.5_amd64.deb ...
Unpacking exim4-daemon-light (4.95-4ubuntu2.5) ...
Selecting previously unselected package exim4.
Preparing to unpack .../exim4_4.95-4ubuntu2.5_all.deb ...
Unpacking exim4 (4.95-4ubuntu2.5) ...
Setting up libgnutls-dane0:amd64 (3.7.3-4ubuntu1.5) ...
Setting up exim4-config (4.95-4ubuntu2.5) ...
Adding system-user for exim (v4)
Setting up exim4-base (4.95-4ubuntu2.5) ...
exim: DB upgrade, deleting hints-db
Created symlink /etc/systemd/system/timers.target.wants/exim4-base.timer → /lib/systemd/system/exim4-base.timer.
exim4-base.service is a disabled or a static unit, not starting it.
Setting up exim4-daemon-light (4.95-4ubuntu2.5) ...
Setting up exim4 (4.95-4ubuntu2.5) ...
Processing triggers for man-db (2.10.2-1) ...
Processing triggers for libc-bin (2.35-0ubuntu3.7) ...
Scanning processes...
Scanning candidates...
Scanning processor microcode...
Scanning linux images...

The processor microcode seems to be up-to-date.

Restarting services...
 systemctl restart irqbalance.service packagekit.service php8.1-fpm.service polkit.service supervisor.service
Service restarts being deferred:
 systemctl restart networkd-dispatcher.service
 systemctl restart unattended-upgrades.service

No containers need to be restarted.

No user sessions are running outdated binaries.

No VM guests are running outdated hypervisor (qemu) binaries on this host.
After the installation is complete, you can check the installed Exim version with the command:
exim --version
result:
root@tutorialspots ~ # exim --version
Exim version 4.95 #2 built 11-Jan-2024 13:16:58
Copyright (c) University of Cambridge, 1995 - 2018
(c) The Exim Maintainers and contributors in ACKNOWLEDGMENTS file, 2007 - 2020
Berkeley DB: Berkeley DB 5.3.28: (September  9, 2013)
Support for: crypteq iconv() IPv6 GnuTLS TLS_resume move_frozen_messages DANE DKIM DNSSEC Event I18N OCSP PIPE_CONNECT PRDR Experimental_Queue_Ramp SOCKS SRS TCP_Fast_Open
Lookups (built-in): lsearch wildlsearch nwildlsearch iplsearch cdb dbm dbmjz dbmnz dnsdb dsearch nis nis0 passwd
Authenticators: cram_md5 external plaintext
Routers: accept dnslookup ipliteral manualroute queryprogram redirect
Transports: appendfile/maildir/mailstore autoreply lmtp pipe smtp
Fixed never_users: 0
Configure owner: 0:0
Size of off_t: 8
Configuration file search path is /etc/exim4/exim4.conf:/var/lib/exim4/config.autogenerated
Configuration file is /var/lib/exim4/config.autogenerated
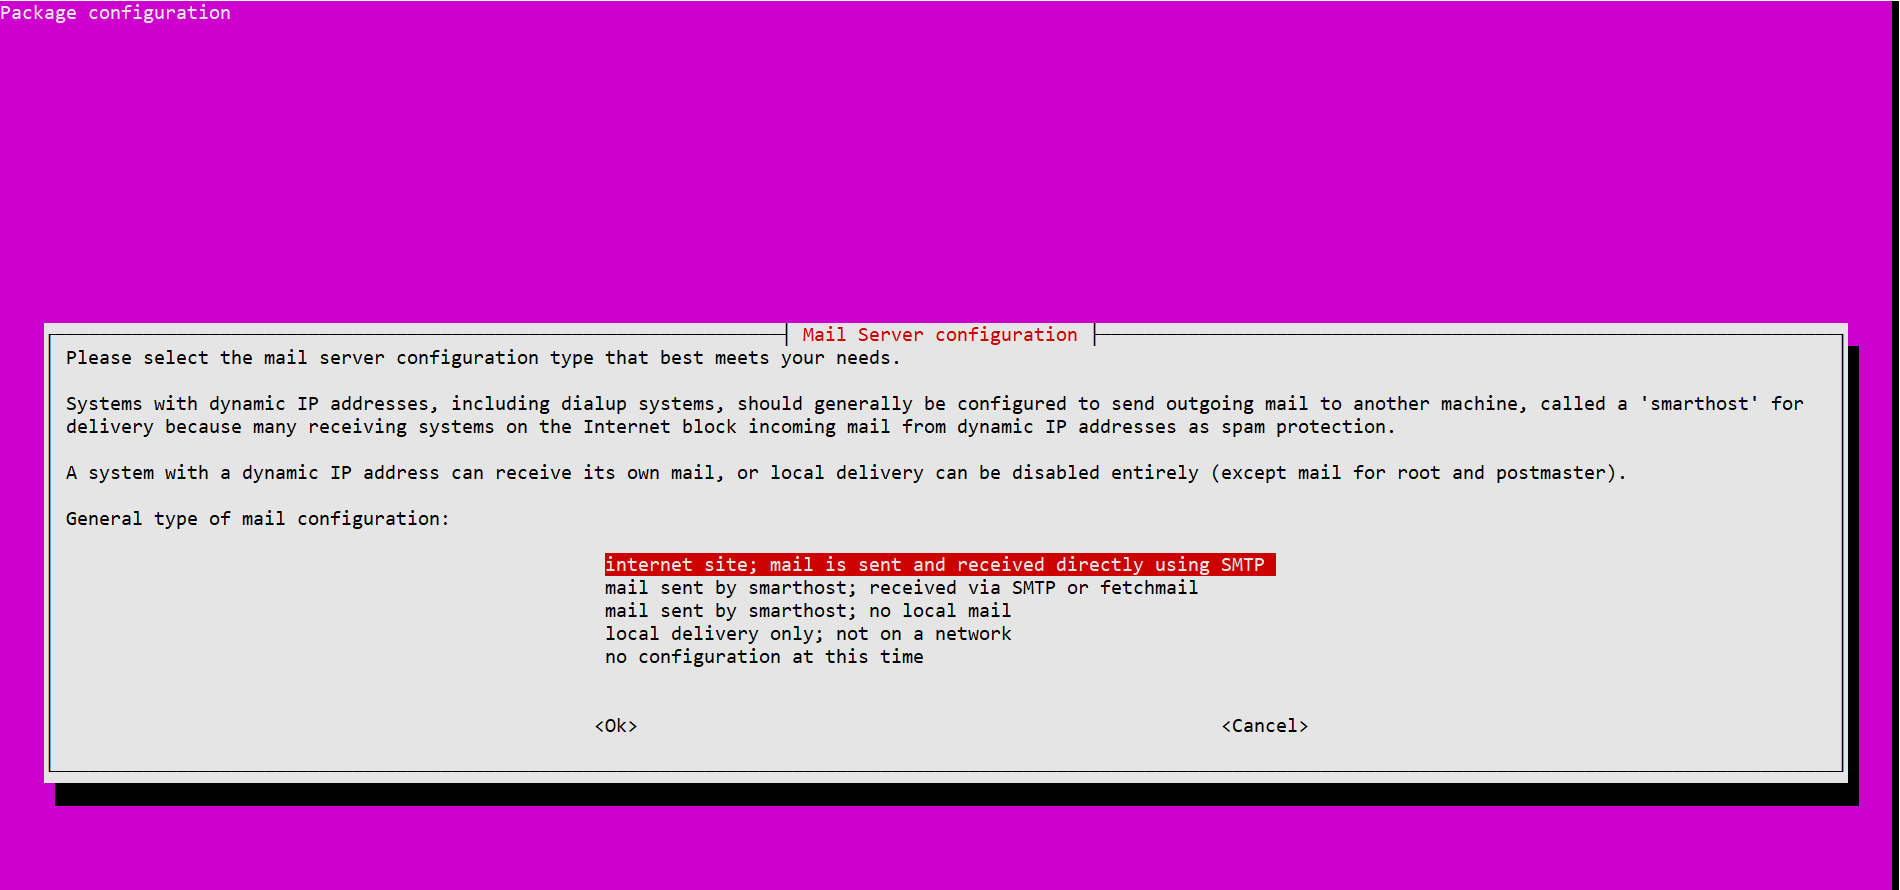
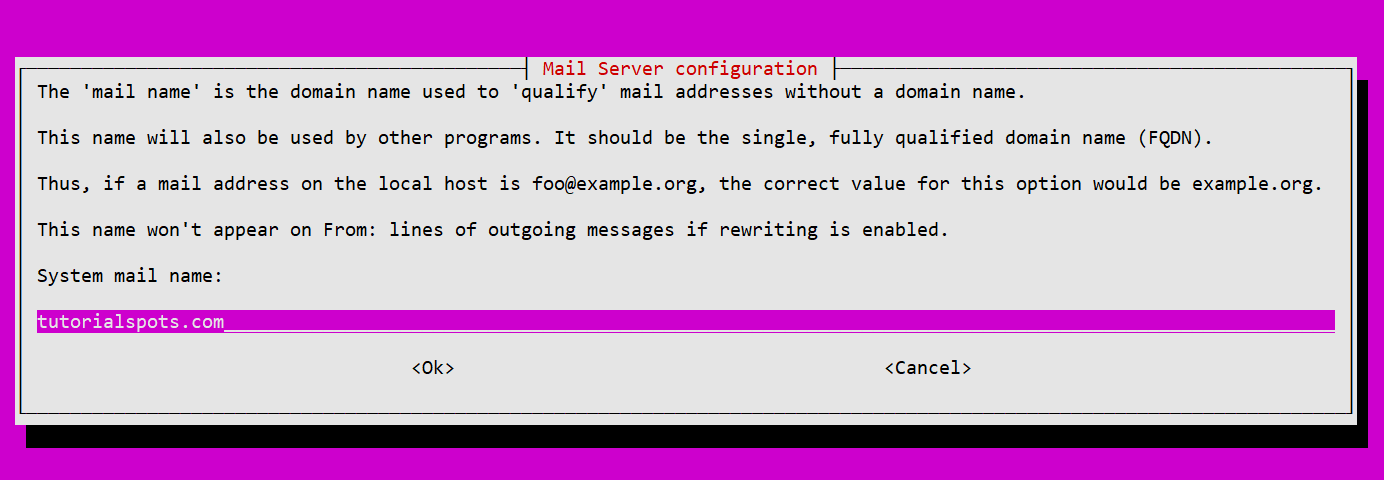
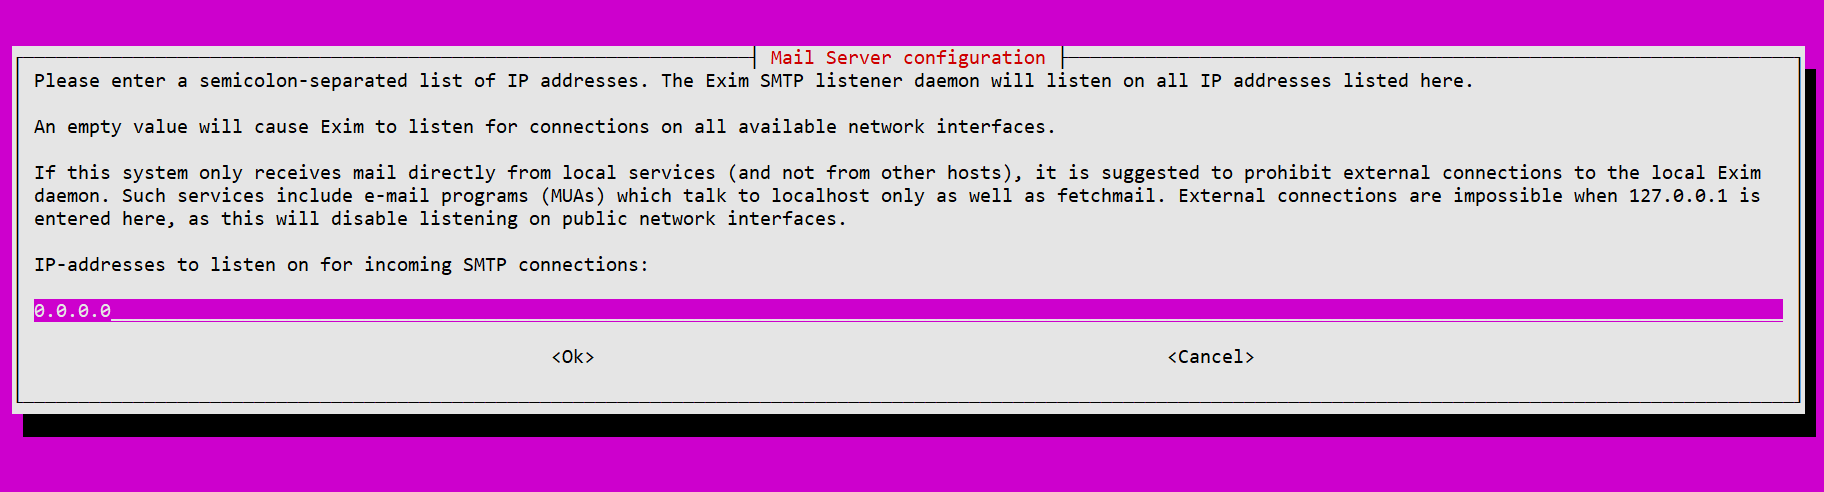
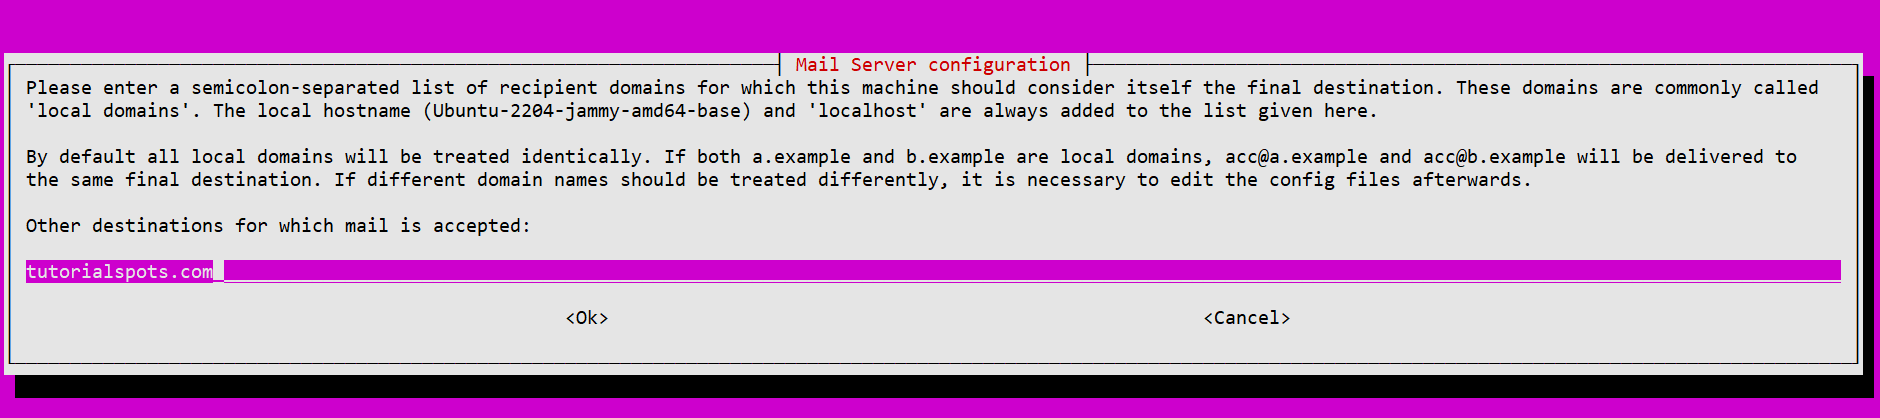
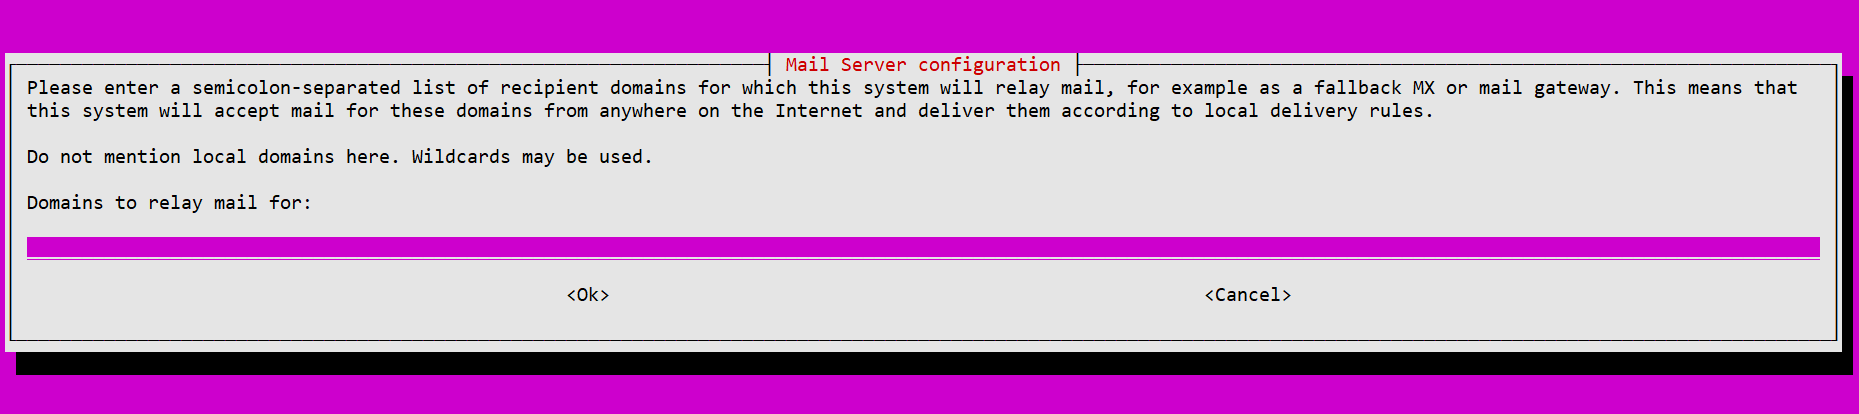
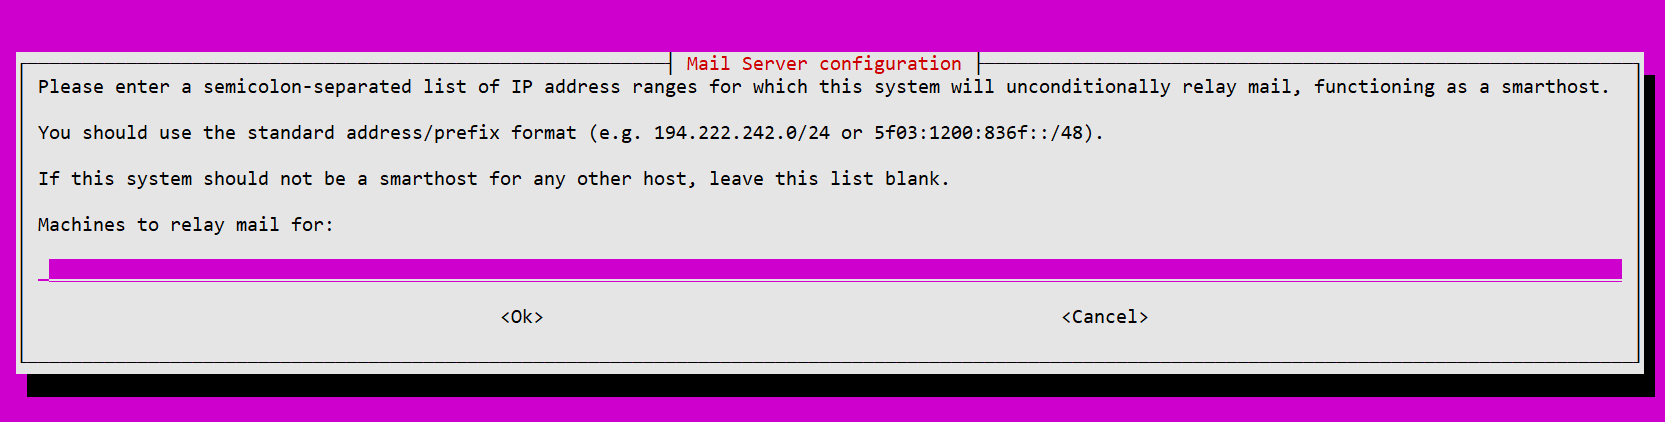
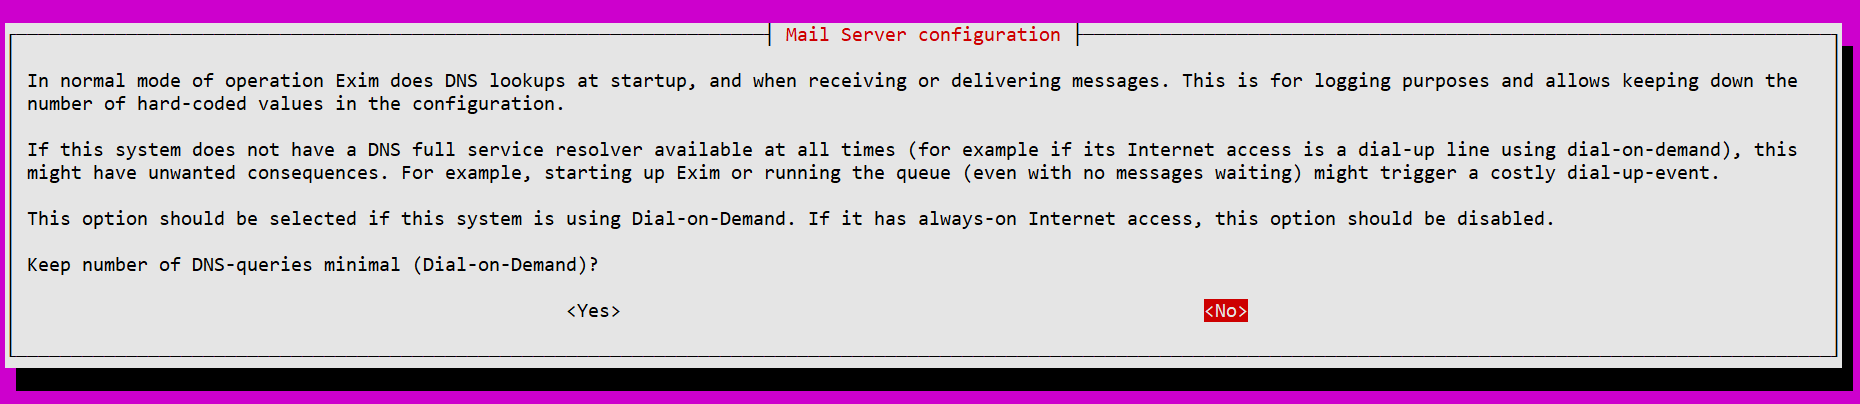
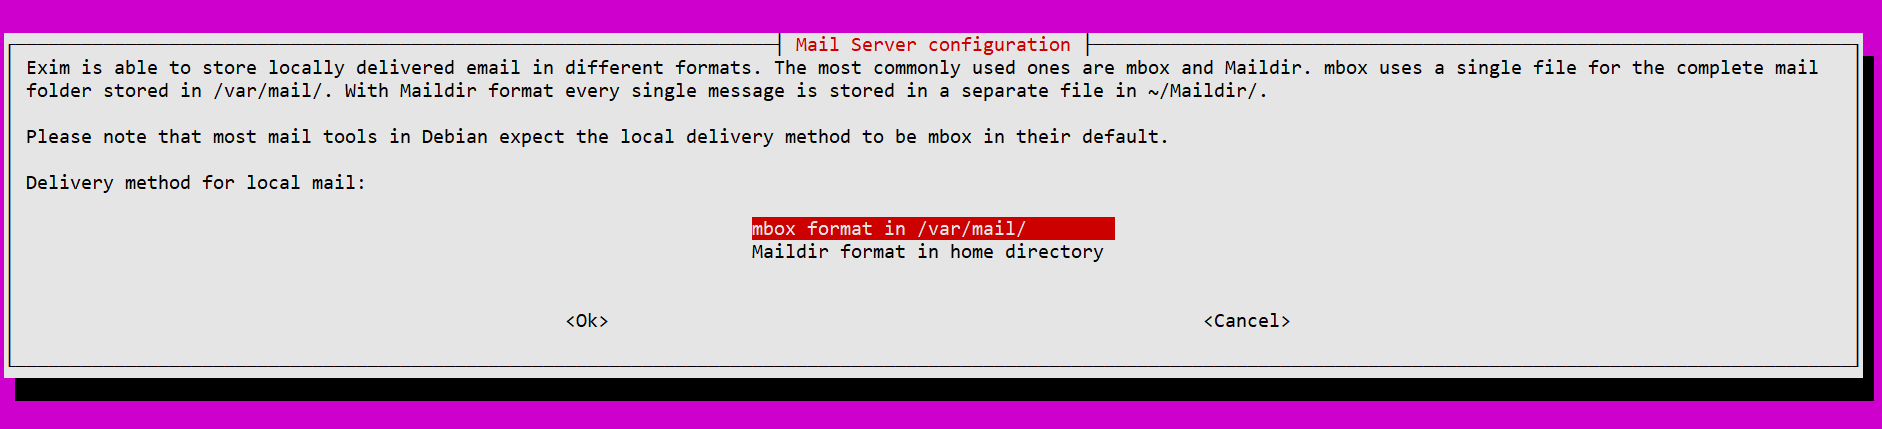
Step 2: Configure Exim
use command:
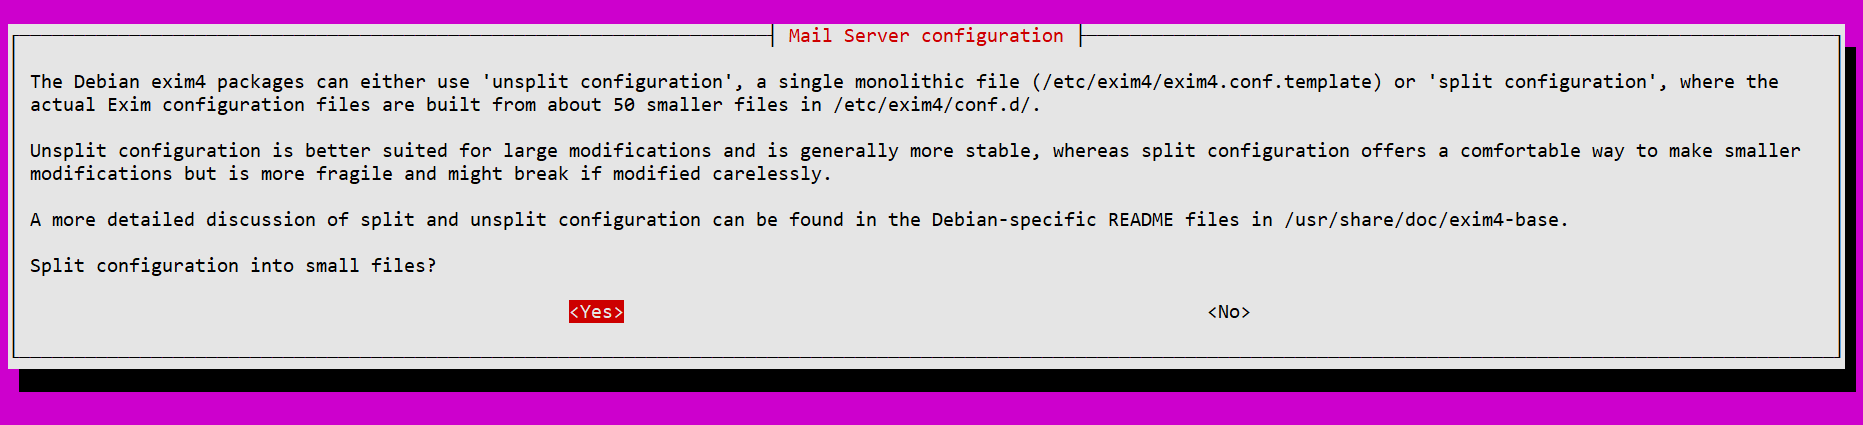
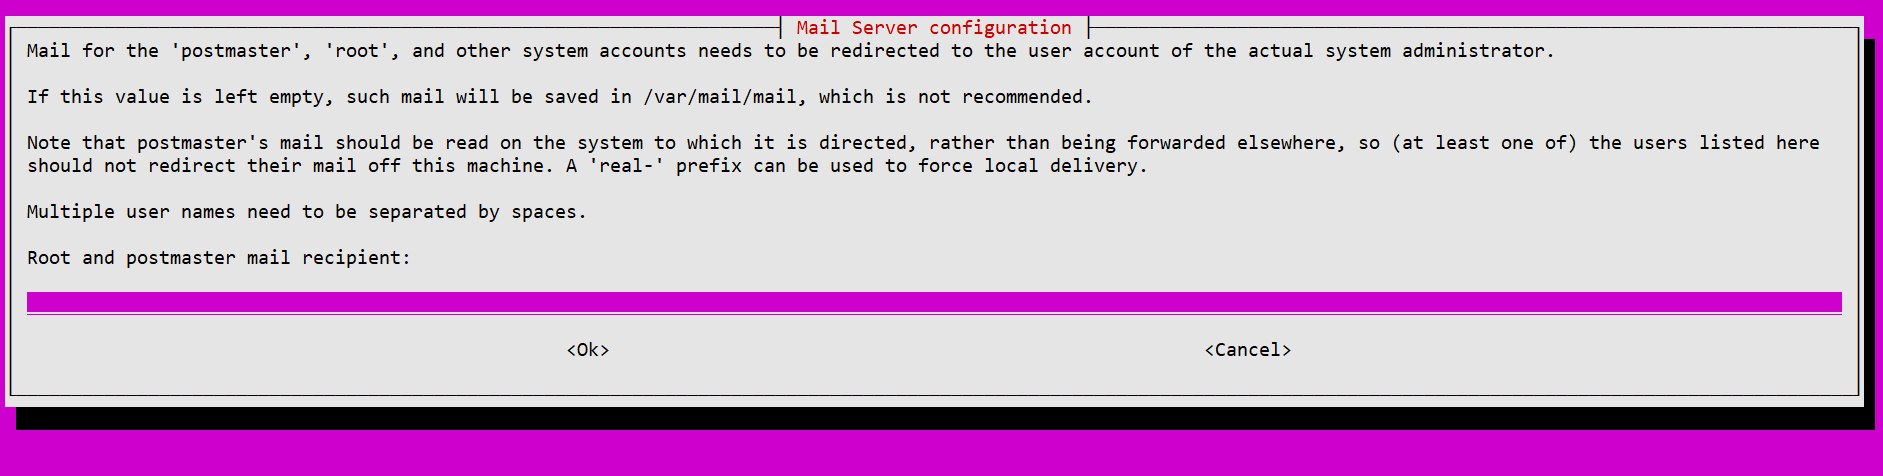
dpkg-reconfigure exim4-config
Edit file /etc/exim4/conf.d/main/02_exim4-config_options , add line
disable_ipv6 = true
Restart service exim4
Step 3: SPF configuration:
Add SPF Record to DNS :
Log in to your domain’s DNS admin account. Usually through the administration interface of the domain name provider or DNS service you are using.
Add a new TXT record with the following content:
v=spf1 a:mail.yourdomain.com ip4:<server_ip> include:_spf.google.com ~all
example
v=spf1 a:mail.yourdomain.com ip4:11.11.11.11 include:_spf.google.com ~all
Or for cloudflare DNS:
v=spf1 include:_spf.mx.cloudflare.net ~all
Save changes.
read more about SPF: https://support.google.com/a/answer/10685031?sjid=14440567733282704103-AP
Step 4: Install OpenDKIM tools using the following command:
sudo apt install opendkim-tools
sudo apt install opendkim-tools
Reading package lists... Done
Building dependency tree... Done
  python3-debconf python3-debian python3-distupgrade python3-hamcrest
  python3-hyperlink python3-idna python3-incremental python3-jeepney
  python3-jwt python3-keyring python3-lazr.uri python3-oauthlib
  python3-openssl python3-problem-report python3-pyasn1 python3-pyasn1-modules
  python3-pyparsing python3-secretstorage python3-serial
  python3-service-identity python3-six python3-systemd python3-twisted
  python3-update-manager python3-wadllib python3-zope.interface
Use 'sudo apt autoremove' to remove them.
The following NEW packages will be installed:
  opendkim-tools
0 upgraded, 1 newly installed, 0 to remove and 36 not upgraded.
Need to get 84.8 kB of archives.
After this operation, 382 kB of additional disk space will be used.
Get:1 http://mirror.hetzner.com/ubuntu/packages jammy/universe amd64 opendkim-tools amd64 2.11.0~beta2-6 [84.8 kB]
Fetched 84.8 kB in 0s (3,005 kB/s)
Selecting previously unselected package opendkim-tools.
(Reading database ... 73605 files and directories currently installed.)
Preparing to unpack .../opendkim-tools_2.11.0~beta2-6_amd64.deb ...
Unpacking opendkim-tools (2.11.0~beta2-6) ...
Setting up opendkim-tools (2.11.0~beta2-6) ...
Processing triggers for man-db (2.10.2-1) ...
Scanning processes...
Scanning candidates...
Scanning processor microcode...
Scanning linux images...

The processor microcode seems to be up-to-date.

Restarting services...
 systemctl restart supervisor.service
Service restarts being deferred:
 /etc/needrestart/restart.d/dbus.service
 systemctl restart getty@tty1.service
 systemctl restart networkd-dispatcher.service
 systemctl restart systemd-logind.service
 systemctl restart unattended-upgrades.service
 systemctl restart user@0.service

No containers need to be restarted.

No user sessions are running outdated binaries.

No VM guests are running outdated hypervisor (qemu) binaries on this host.
Step 5: Generate a key pair for DKIM with the following command:
sudo opendkim-genkey -t -s <selector> -d <your_domain>
Replace
<selector>
with a name of your choice (eg:postmaster) and
If you want to use email admin@yourdomain.com you use
<selector>
is admin
This command will create two files:
<selector>.private
and
<selector>.txt
Step 6: create DKIM’s key directory
/etc/exim4/dkim/
Step 7: Move the private key into DKIM’s key directory:
sudo mv <selector>.private /etc/exim4/dkim/<selector>.private
Step 8: Specify ownership for the lock file
sudo chown -R Debian-exim:Debian-exim /etc/exim4/dkim
Step 9: Add DKIM Records to DNS :
open file
<selector>.txt
Example:
cat postmaster.txt
You will see content like:
postmaster._domainkey   IN      TXT     ( "v=DKIM1; h=sha256; k=rsa; t=y; "
          "p=MIIBIjANBgkqhkiG9w0BAQEFAAOCAQ8AMIIBCgKCAQEAjz0DntbdxG6wc3BbxidEQMLB3NOUq/0zZe6a8hwLjNuRUNngtk2pFLxKhzXrwud9lfVZdts/tvQ0p/eWpi5VsKeaJf9eE/Vm00doL4lg+U7AWwWw/kSsa8H9k/wlS5LQzKNol33ysjFEtTD/K12KzNPmfGB0R727yaocA4SvKMz2iShzu8uwKiREIR7bLLxXtLKVHlI4zdLEIy"
          "kCcy8NZ16mMTZ7qXqmPabXmjY4+aeIhFXf8b87ELPmG7zZwvdyfFg82c7hmNN8MFgTGBLu52QWb3umvAvmZRDrSET+it4sfPH1ikPdRBBCa0l7AUyUmIBzM0XXtVvC1iHCMXL7YQIDAQAB" )  ; ----- DKIM key postmaster for yourdomain.com
you only need to copy parts
p=<public_key>
of the recording.
p=MIIBIjANBgkqhkiG9w0BAQEFAAOCAQ8AMIIBCgKCAQEAjz0DntbdxG6wc3BbxidEQMLB3NOUq/0zZe6a8hwLjNuRUNngtk2pFLxKhzXrwud9lfVZdts/tvQ0p/eWpi5VsKeaJf9eE/Vm00doL5lg+U7AWwWw/kSsa8H9k/wlS4LQzKNol33ysjFEtTD/K12KzNPmfGB0R727yaocA4SvKMz2iShzu8uwKiREIR7bLLxXtLKVHlI4zdLEIykCcy8NZ16mMTZ7qXqmPabXmjY4+aeIhFXf8b87ELPmG7zZwvdyfFg82c7hmNN8MFgTGBLu52QWb3umvAvmZRDrSET+it4sfPH1ikPdRBBCa0l7AUyUmIBzM0XXtVvC1iHCMXL7YQIDAQAB
Add TXT record postmaster._domainkey
Step 10: Configure Exim to use DKIM:
Exim configuration :
Edit Exim’s configuration file /etc/exim4/conf.d/main/02_exim4-config_options
add theses lines at top
DKIM_DOMAIN = tutorialspots.com
DKIM_SELECTOR = postmaster
DKIM_PRIVATE_KEY = /etc/exim4/dkim/postmaster.private
Step 11: Restart Exim :
sudo systemctl restart exim4
Verify SMTP server:
root@tutorialspots ~ # telnet 127.0.0.1 25
Trying 127.0.0.1...
Connected to 127.0.0.1.
Escape character is '^]'.
220 Ubuntu-2204-jammy-amd64-base ESMTP Exim 4.95 Ubuntu Mon, 13 May 2024 08:36:07 +0000