
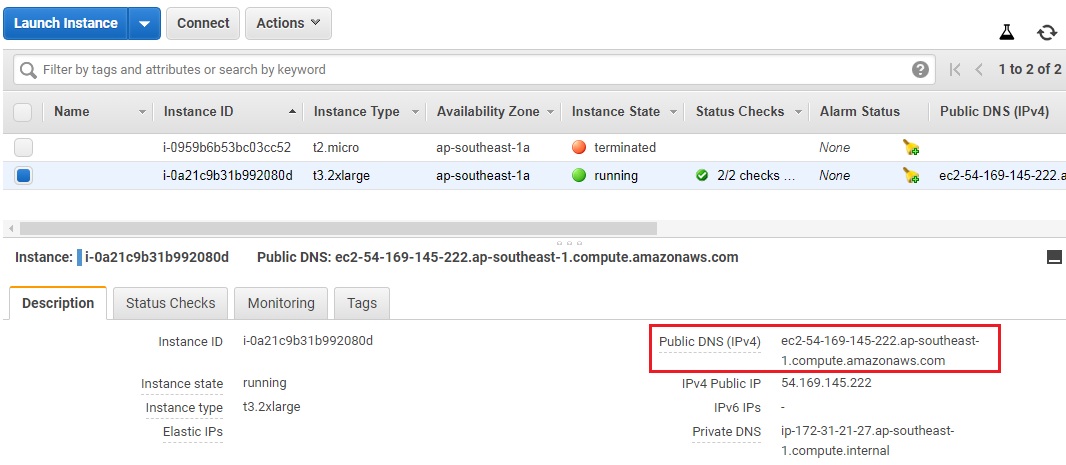
After create instance you have a pem key like vps1.pem and some information like:
Public DNS (IPv4)
ec2-54-169-145-222.ap-southeast-1.compute.amazonaws.com
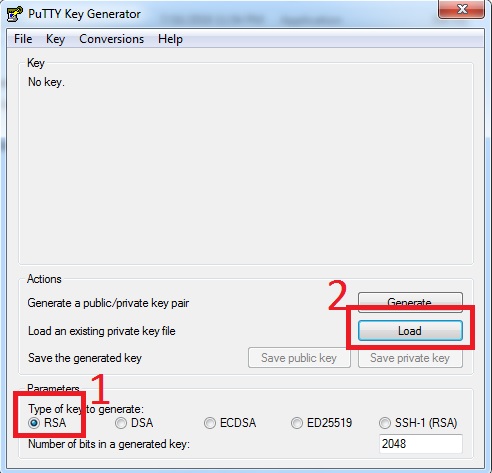
Convert your private key
Step 1: open PuTTYgen, load private key vps1.pem
Step 2: click OK then click Save private key
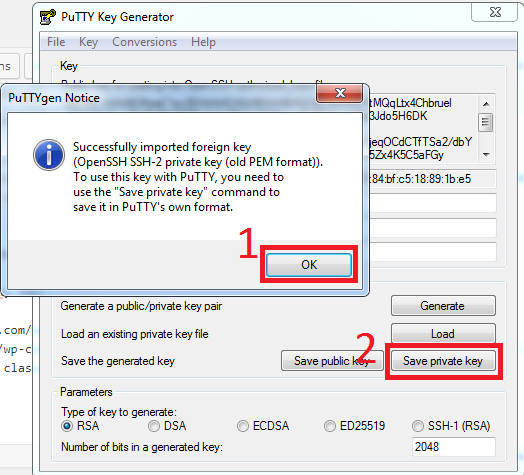
Now you have a file eg: vps1.ppk
Starting a PuTTY Session
Step 1: open putty
In the Host Name box, enter user_name@public_dns_name
- For Amazon Linux 2 or the Amazon Linux AMI, the user name is ec2-user.
- For a Centos AMI, the user name is centos.
- For a Debian AMI, the user name is admin.
- For a Fedora AMI, the user name is ec2-user or fedora.
- For a RHEL AMI, the user name is ec2-user.
- For a SUSE AMI, the user name is ec2-user.
- For an Ubuntu AMI, the user name is ubuntu.
Eg: ec2-user@ec2-54-169-145-222.ap-southeast-1.compute.amazonaws.com
Port: 22
Connnection type: SSH
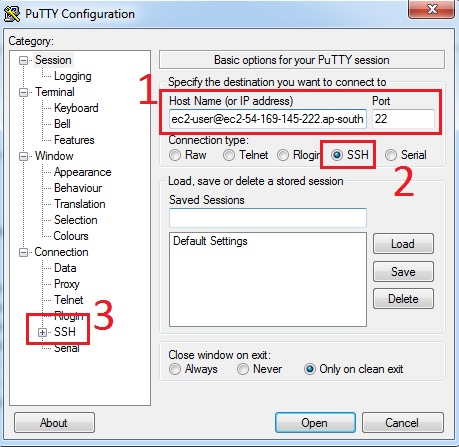
Click SSH
Step 2: Click Auth->Browse then choose your ppk file (eg: vps1.ppk)
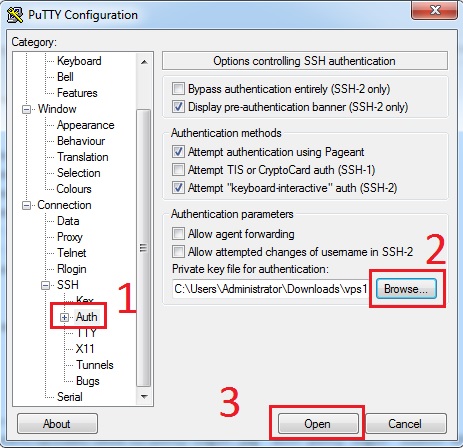
Click Open
Enable root login
Step 1:
sudo vi /etc/ssh/sshd_config
…
PermitRootLogin yes
# Only allow root to run commands over ssh, no shell
#PermitRootLogin forced-commands-only
…
# To disable tunneled clear text passwords, change to no here!
PasswordAuthentication yes
#PermitEmptyPasswords no
# EC2 uses keys for remote access
#PasswordAuthentication no
…
Step 2: Reload the sshd settings:
sudo service sshd reload
Step 3: Select a password for root:
sudo passwd root
Now you can login as root, and you can use Bitvise Tunnelier for login
su root
1 Comment
How to use Amazon Lightsail Linux with Putty and Bitvise Tunnelier | Free Online Tutorials
(January 9, 2019 - 10:42 am)[…] Convert your private key See: How to use AWS EC2 Linux with Putty and Bitvise Tunnelier […]