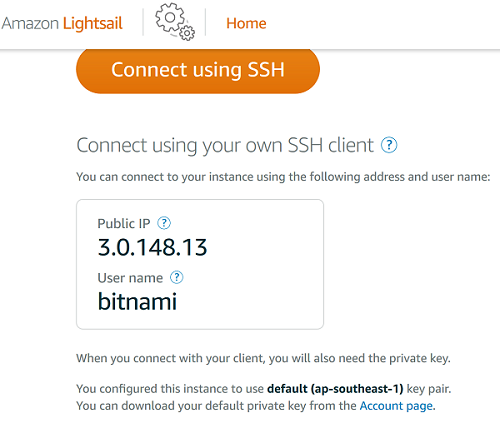
After create VPS, you will see info:
Convert your private key
See: How to use AWS EC2 Linux with Putty and Bitvise Tunnelier
Starting a PuTTY Session
Step 1: open putty
In the Host Name box, enter user@your_ip
Eg: bitnami@13.228.105.81
Port: 22
Connnection type: SSH
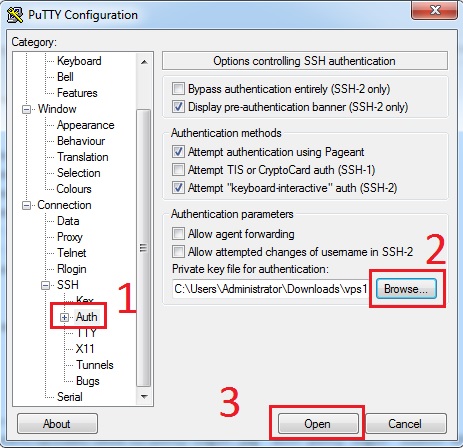
Step 2: Click Auth->Browse then choose your ppk file (eg: 1.ppk)
Click Open
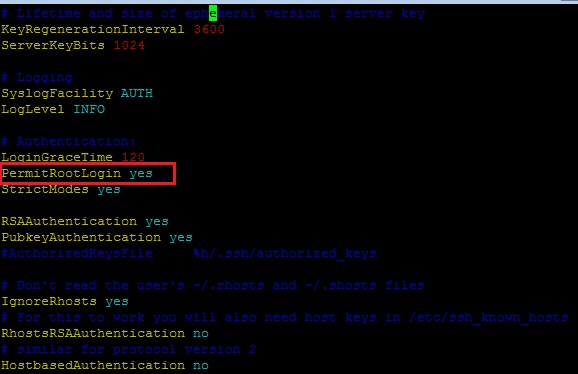
Enable root login
Step 1:
sudo vi /etc/ssh/sshd_config
...
# Authentication:
LoginGraceTime 120
PermitRootLogin yes
StrictModes yes

...
# Change to no to disable tunnelled clear text passwords
PasswordAuthentication yes
...
Step 2: Reload the sshd settings:
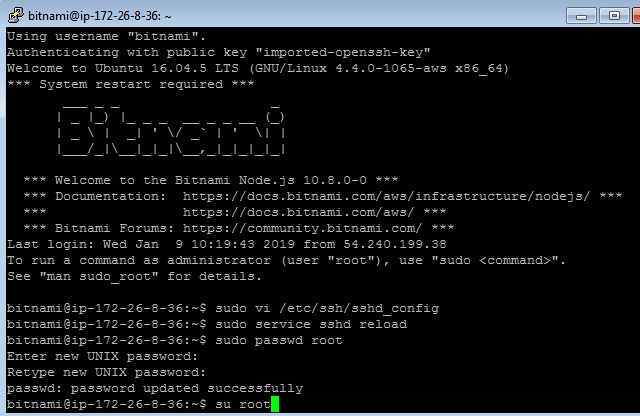
sudo service sshd reload
Step 3: Select a password for root:
sudo passwd root
Now you can login as root, and you can use Bitvise Tunnelier for login
su root
Done, now you can use Bitvise Tunnelier to access your VPS:
Welcome to Ubuntu 16.04.5 LTS (GNU/Linux 4.4.0-1065-aws x86_64)
*** System restart required ***
       ___ _ _                   _
      | _ |_) |_ _ _  __ _ _ __ (_)
      | _ \ |  _| ' \/ _` | '  \| |
      |___/_|\__|_|_|\__,_|_|_|_|_|

  *** Welcome to the Bitnami Node.js 10.8.0-0 ***
  *** Documentation:  https://docs.bitnami.com/aws/infrastructure/nodejs/ ***
  ***                 https://docs.bitnami.com/aws/ ***
  *** Bitnami Forums: https://community.bitnami.com/ ***
root@ip-172-26-8-36:~#


