After order a server from Hetzner, you will receive an email with content login SSH
IPv4 Address:	51.91.111.128
IPv6 Address:	2a11:4f81:1612:3333::3
Username:	root
Password:	xxxxxxxxxxxx
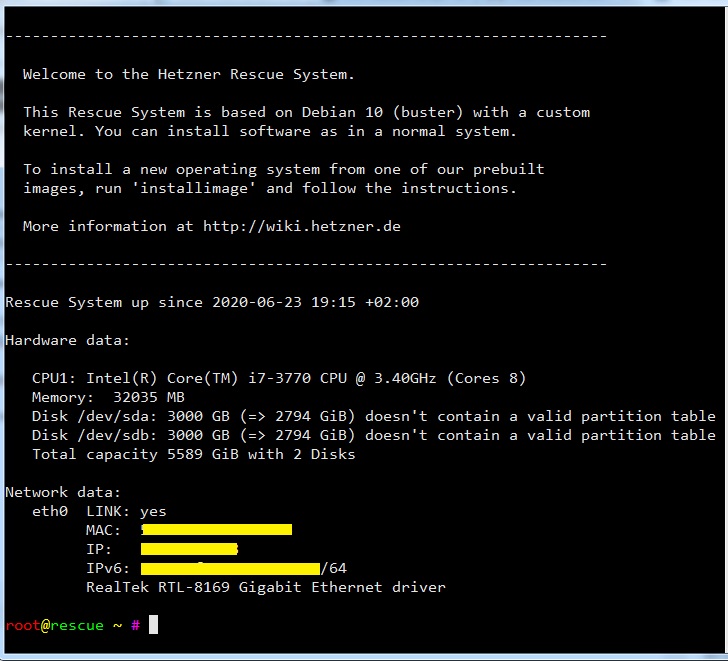
Login SSH we will see a message:
-------------------------------------------------------------------

  Welcome to the Hetzner Rescue System.

  This Rescue System is based on Debian 10 (buster) with a custom
  kernel. You can install software as in a normal system.

  To install a new operating system from one of our prebuilt
  images, run 'installimage' and follow the instructions.

  More information at http://wiki.hetzner.de

-------------------------------------------------------------------

Rescue System up since 2020-06-23 19:15 +02:00

Hardware data:

   CPU1: Intel(R) Core(TM) i7-3770 CPU @ 3.40GHz (Cores 8)
   Memory:  32035 MB
   Disk /dev/sda: 3000 GB (=> 2794 GiB) doesn't contain a valid partition table
   Disk /dev/sdb: 3000 GB (=> 2794 GiB) doesn't contain a valid partition table
   Total capacity 5589 GiB with 2 Disks

Network data:
   eth0  LINK: yes
         MAC:  51:41:5d:9f:61:f3
         IP:   51.91.111.128
         IPv6: 2a11:4f81:1612:3333::3/64
         RealTek RTL-8169 Gigabit Ethernet driver
The server has 2 HDD (3000 GB), now we want to use a drive with capacity about 6000 GB, we use RAID-0
Step 1: Use command:
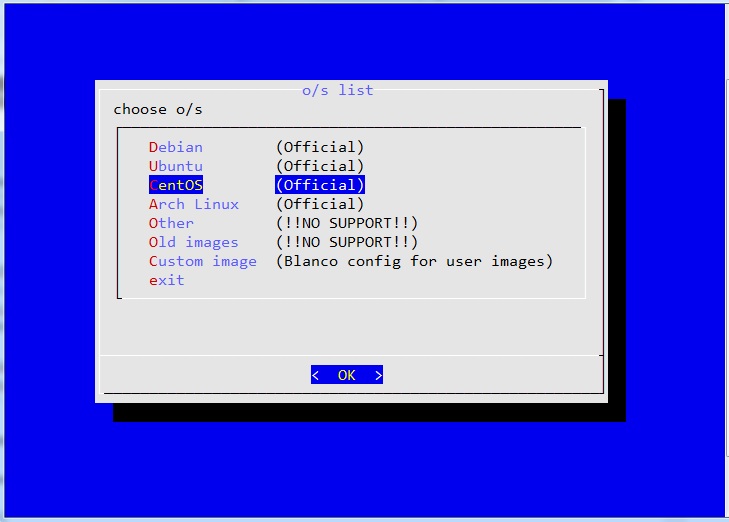
installimage
Step 2: Choose CentOS then enter or click OK
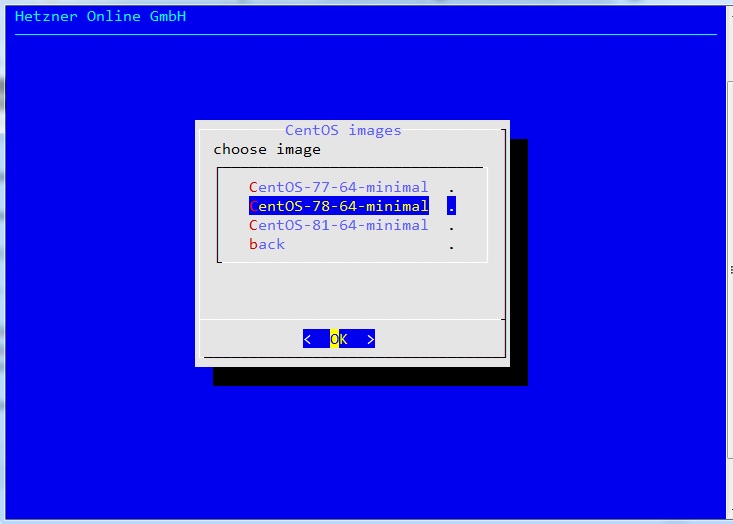
Step 3: Choose CentOS-78-64-minimal then enter or click OK
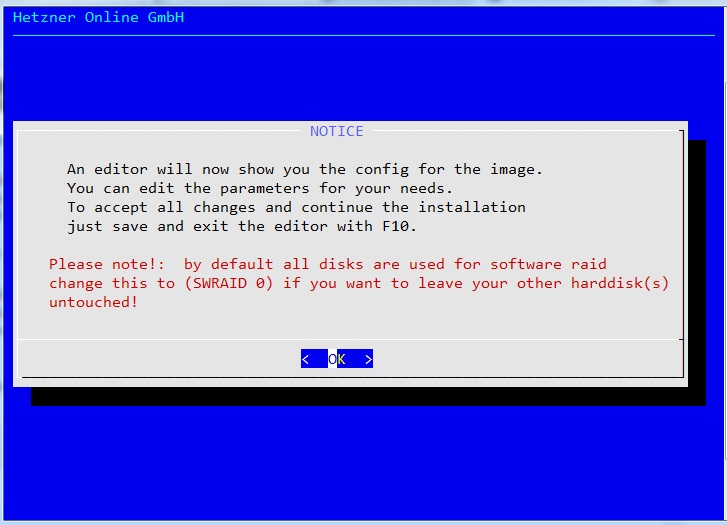
Step 4: enter or click OK
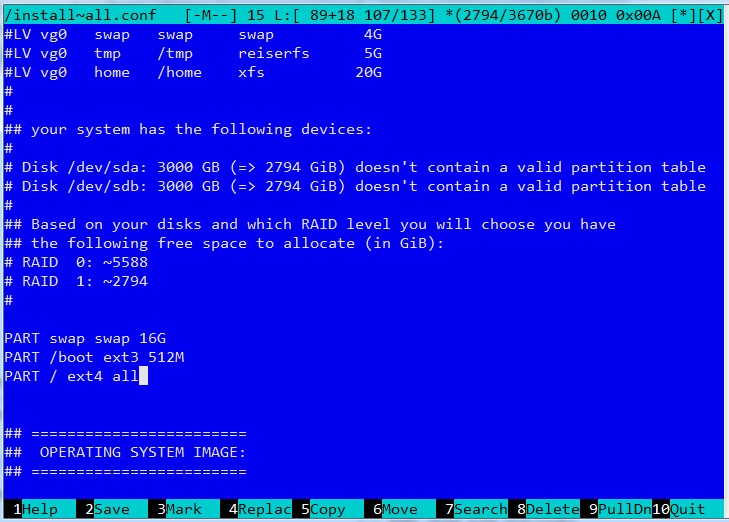
Now we will see an editor, we can edit file config:
Step 5:
we edit some lines:
SWRAIDLEVEL 1
to
SWRAIDLEVEL 0
PART swap swap 16G
PART /boot ext3 512M
PART / ext4 1024G
PART /home ext4 all
to
PART swap swap 16G
PART /boot ext3 512M
PART / ext4 all
Then Press F2 to save and F10 to exit editor
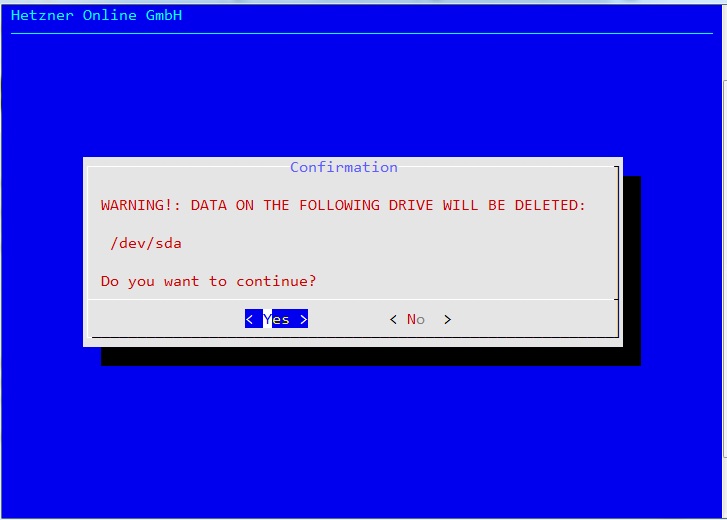
Choose Yes (repeat 2 times)
Done, now wait about 3 minutes
                Hetzner Online GmbH - installimage

  Your server will be installed now, this will take some minutes
             You can abort at any time with CTRL+C ...

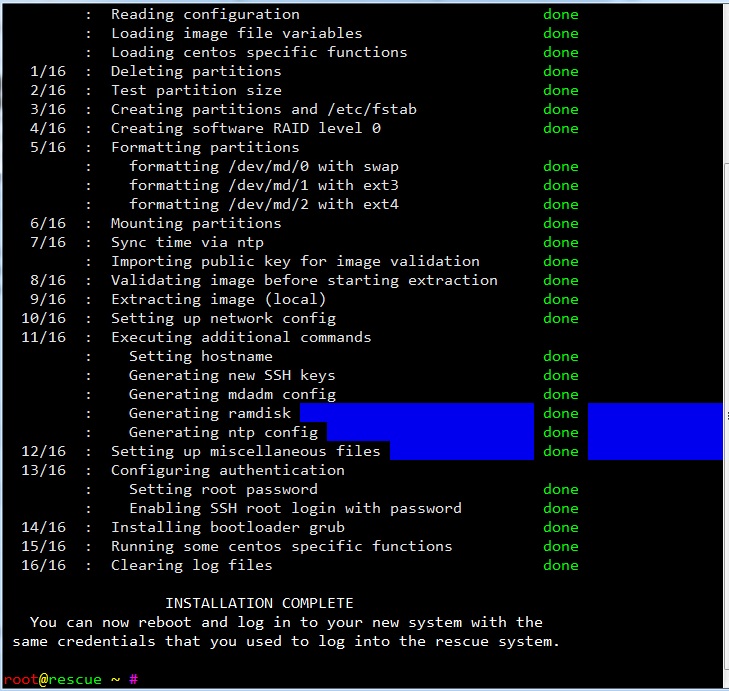
         :  Reading configuration                           done
         :  Loading image file variables                    done
         :  Loading centos specific functions               done
   1/16  :  Deleting partitions                             done
   2/16  :  Test partition size                             done
   3/16  :  Creating partitions and /etc/fstab              done
   4/16  :  Creating software RAID level 0                  done
   5/16  :  Formatting partitions
         :    formatting /dev/md/0 with swap                done
         :    formatting /dev/md/1 with ext3                done
         :    formatting /dev/md/2 with ext4                done
   6/16  :  Mounting partitions                             done
   7/16  :  Sync time via ntp                               done
         :  Importing public key for image validation       done
   8/16  :  Validating image before starting extraction     done
   9/16  :  Extracting image (local)                        done
  10/16  :  Setting up network config                       done
  11/16  :  Executing additional commands
         :    Setting hostname                              done
         :    Generating new SSH keys                       done
         :    Generating mdadm config                       done
         :    Generating ramdisk                            done
         :    Generating ntp config                         done
  12/16  :  Setting up miscellaneous files                  done
  13/16  :  Configuring authentication
         :    Setting root password                         done
         :    Enabling SSH root login with password         done
  14/16  :  Installing bootloader grub                      done
  15/16  :  Running some centos specific functions          done
  16/16  :  Clearing log files                              done

                  INSTALLATION COMPLETE
   You can now reboot and log in to your new system with the
 same credentials that you used to log into the rescue system.
Step 6: reboot
Done!, check disk
[root@tutorialspots ~]# df -h
Filesystem      Size  Used Avail Use% Mounted on
devtmpfs         16G     0   16G   0% /dev
tmpfs            16G     0   16G   0% /dev/shm
tmpfs            16G  528K   16G   1% /run
tmpfs            16G     0   16G   0% /sys/fs/cgroup
/dev/md2        5.4T  1.3G  5.2T   1% /
/dev/md1        487M  135M  327M  30% /boot
tmpfs           3.2G     0  3.2G   0% /run/user/0
Recent search terms:
- hetzner rescue check disks

