Introduce:
By default, when programming languages such as C/C ++, C #, Swift, or Java, you must declare yourself the libraries that contain the methods or classes we use, with C/C ++ using #include, with C# uses using using with Swift and Java using the Import keyword. And sometimes they just remember the class name or method name without remembering the namespace or package letters, then using the suggestion of the IDE then having to manually import them. Instead of doing so manually, Android Studio has a feature that allows us to do it automatically and easily when we type the class name or method name.
Enable Auto Import in Android Studio
You are probably familiar with the popup import package when you type the class name as shown below:
If you have a large project, you have to spend a lot of time importing a package like this. So Android Studio provides us with an Auto Import function to automate packages when we use classes and methods that are related to that class.
By default in Android Studio, the Auto Import feature is disabled and to enable it on your computer, do the following:
Mac OS:
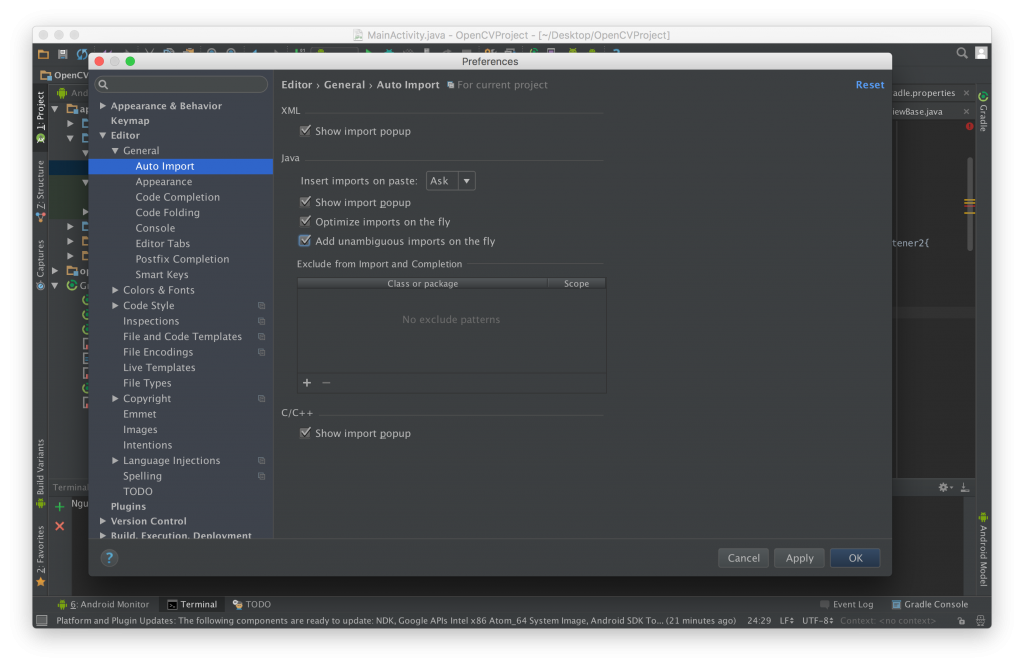
Click on Android Studio on the Toolbar and select Preferences… to open the Preferences dialog box.
In this dialog we choose Editor> General> Auto and tick all check boxes in the right pane.
Then click Apply and OK to let Android Studio save the settings.
Windows and Linux
For Windows and Linux we do the following
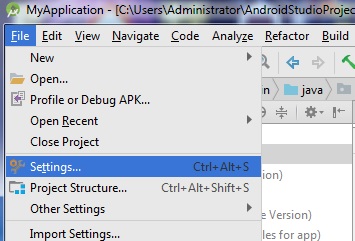
Go to File on the toolbar and select Settings
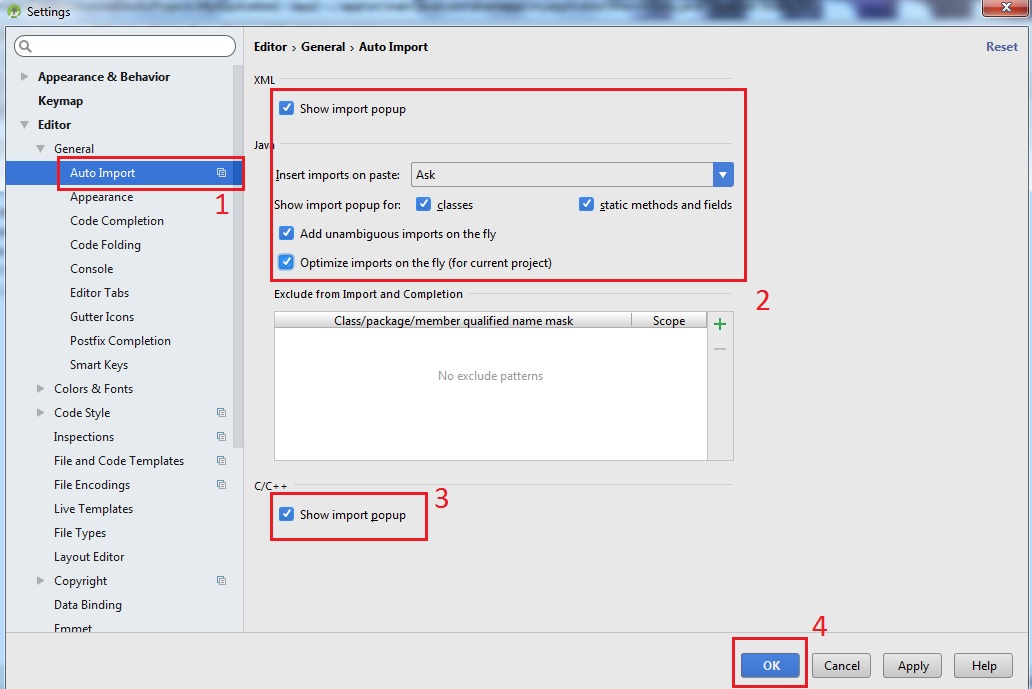
In the Setting dialog box select Editor> General> Auto and tick all check boxes in the right pane.
Then click Apply and OK to let Android Studio save the settings.
Now we can write code very comfortably and Android Studio automatically imports the necessary packages for us.
Here we have shared with you a very interesting and useful feature in the toolkit for Android development is Android Studio. Share your experiences or tips when using Android Studio for everyone to learn and exchange.


