
Controllers are responsible for handling incoming requests and returning responses to the client.
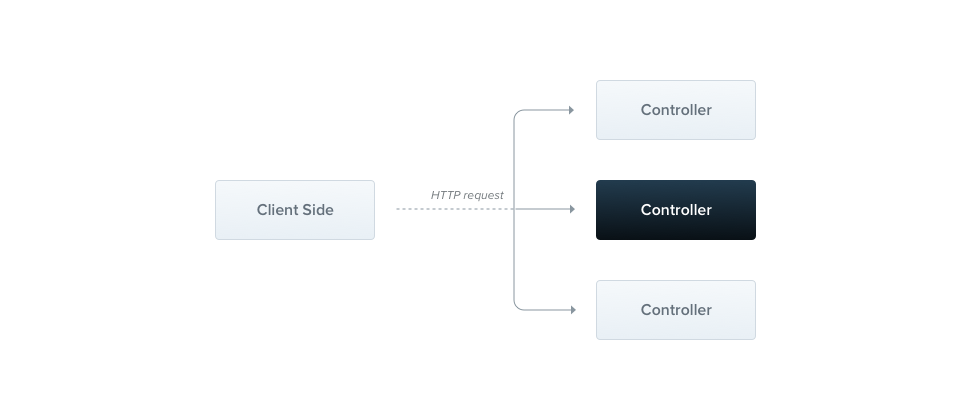
A controller’s purpose is to receive specific requests for the application. The routing mechanism controls which controller receives which requests. Frequently, each controller has more than one route, and different routes can perform different actions.
In order to create a basic controller, we use classes and decorators. Decorators associate classes with required metadata and enable Nest to create a routing map (tie requests to the corresponding controllers).
Routing
In the following example we’ll use the @Controller() decorator, which is required to define a basic controller. We’ll specify an optional route path prefix of controller_name. Using a path prefix in a @Controller() decorator allows us to easily group a set of related routes, and minimize repetitive code. For example, we may choose to group a set of routes that manage interactions with a customer entity under the route /customers. In that case, we could specify the path prefix customers in the @Controller() decorator so that we don’t have to repeat that portion of the path for each route in the file.
To create a controller using the CLI, simply execute the command: nest g controller controller_name
D:\TypeScript\Nestjs\project1>nest g controller controller_name
CREATE src/controller-name/controller-name.controller.spec.ts (549 bytes)
CREATE src/controller-name/controller-name.controller.ts (118 bytes)
UPDATE src/app.module.ts (364 bytes)
New files created:
src
 |--controller-name
   |--controller-name.controller.spec.ts
   |--controller-name.controller.ts
default content of file controller-name.controller.ts
import { Controller } from '@nestjs/common';

@Controller('controller-name')
export class ControllerNameController {}
Now, we can create a basic example: controller-name.controller.ts
import { Controller, Get } from '@nestjs/common';

@Controller('controller-name')
export class ControllerNameController {
    @Get()
    index():string {
        return "Index of Controller controller-name"
    }
}
(Example Link: http://localhost:3000/controller-name/)
Note:
@Controller('controller-name')
is equivalent to
@Controller({
    path: 'controller-name'
})
The @Get() HTTP request method decorator before the index() method tells Nest to create a handler for a specific endpoint for HTTP requests. The endpoint corresponds to the HTTP request method (GET in this case) and the route path. What is the route path? The route path for a handler is determined by concatenating the (optional) prefix declared for the controller, and any path specified in the request decorator. Since we’ve declared a prefix for every route (controller-name), and haven’t added any path information in the decorator, Nest will map GET /controller-name requests to this handler. As mentioned, the path includes both the optional controller path prefix and any path string declared in the request method decorator. For example, a path prefix of customers combined with the decorator @Get('profile') would produce a route mapping for requests like GET /customers/profile.
In our example above, when a GET request is made to this endpoint, Nest routes the request to our user-defined index() method. Note that the method name we choose here is completely arbitrary. We obviously must declare a method to bind the route to, but Nest doesn’t attach any significance to the method name chosen.
This method will return a 200 status code and the associated response, which in this case is just a string. Why does that happen? To explain, we’ll first introduce the concept that Nest employs two different options for manipulating responses:
| Standard (recommended) | Using this built-in method, when a request handler returns a JavaScript object or array, it will automatically be serialized to JSON. When it returns a JavaScript primitive type (e.g., string, number, boolean), however, Nest will send just the value without attempting to serialize it. This makes response handling simple: just return the value, and Nest takes care of the rest.
Furthermore, the response’s status code is always 200 by default, except for POST requests which use 201. We can easily change this behavior by adding the |
| Library-specific | We can use the library-specific (e.g., Express) response object, which can be injected using the @Res() decorator in the method handler signature (e.g., findAll(@Res() response)). With this approach, you have the ability (and the responsibility), to use the native response handling methods exposed by that object. For example, with Express, you can construct responses using code like response.status(200).send() |
WARNING
You cannot use both approaches at the same time. Nest detects when the handler is using either @Res() or @Next(), indicating you have chosen the library-specific option. If both approaches are used at the same time, the Standard approach is automatically disabled for this single route and will no longer work as expected.
Request object
Handlers often need access to the client request details. Nest provides access to the request object of the underlying platform (Express by default). We can access the request object by instructing Nest to inject it by adding the @Req() decorator to the handler’s signature.
controller-name.controller.ts
import { Controller, Get, Req } from '@nestjs/common';
import { Request } from 'express';

@Controller('controller-name')
export class ControllerNameController {
    //block index() see above example

    @Get('action1')
    action1(@Req() req: Request ):string {
        console.log(req.query)
        return "Action 1 of Controller controller-name"
    }
}
(Example Link: http://localhost:3000/controller-name/action1?param1=1)
The request object represents the HTTP request and has properties for the request query string, parameters, HTTP headers, and body (read more here). In most cases, it’s not necessary to grab these properties manually. We can use dedicated decorators instead, such as @Body() or @Query(), which are available out of the box. Below is a list of the provided decorators and the plain platform-specific objects they represent.
@Request() |
req |
@Response(), @Res()* |
res |
@Next() |
next |
@Session() |
req.session |
@Param(key?: string) |
req.params / req.params[key] |
@Body(key?: string) |
req.body / req.body[key] |
@Query(key?: string) |
req.query / req.query[key] |
@Headers(name?: string) |
req.headers / req.headers[name] |
@Ip() |
req.ip |
* For compatibility with typings across underlying HTTP platforms (e.g., Express and Fastify), Nest provides @Res() and @Response() decorators. @Res() is simply an alias for @Response(). Both directly expose the underlying native platform response object interface. When using them, you should also import the typings for the underlying library (e.g., @types/express) to take full advantage. Note that when you inject either @Res() or @Response() in a method handler, you put Nest into Library-specific mode for that handler, and you become responsible for managing the response. When doing so, you must issue some kind of response by making a call on the response object (e.g., res.json(...) or res.send(...)), or the HTTP server will hang.
Resources
Earlier, we defined an endpoint to fetch the cats resource (GET route). We’ll typically also want to provide an endpoint that creates new records. For this, let’s create the POST handler:
controller-name.controller.ts
import { Controller, Get, Req, Post } from '@nestjs/common';
import { Request } from 'express';

@Controller('controller-name')
export class ControllerNameController {
    //...

    @Post('create')
    create():string {
        return 'This action create a new Object';
    }
}
It’s that simple. Nest provides the rest of the standard HTTP request endpoint decorators in the same fashion – @Put(), @Delete(), @Patch(), @Options(), @Head(), and @All(). Each represents its respective HTTP request method.
Route wildcards
Pattern based routes are supported as well. For instance, the asterisk is used as a wildcard, and will match any combination of characters.
    @Get('find*')
    findAll(@Req() req: Request):string {
        console.log(req.protocol, req.get('host'), req.originalUrl, req.url, req.path)
        return 'This route uses a wildcard';
    }
The 'find*' route path will match find, findAll, find_dog, find+dog, find*dog, find?dog, find(dog, find[dog, find.dog and so on (ignores character case). The characters ?, +, *, [], and () may be used in a route path, and are subsets of their regular expression counterparts. The hyphen (-) and the dot (.) are interpreted literally by string-based paths.
More example:
    @Get('a+b')    //ab aab
    find1():string {
        return 'method find1';
    }
    @Get('b?c')    //bc c
    find2():string {
        return 'method find2';
    }
    @Get('d(e)')    //de
    find3():string {
        return 'method find3';
    }
    @Get('g[hi]')    //gh gi
    find4():string {
        return 'method find4';
    }
    @Get('j[a-z0-9]')    //ja j9
    find5():string {
        return 'method find5';
    }
Special case: duplicate route:
    @Get('ab')
    find1a():string {
        return 'method find1a';
    }
    @Get('a+b')    //ab aab
    find1():string {
        return 'method find1';
    }
    @Get('aab')
    find1b():string {
        return 'method find1b';
    }
http://localhost:3000/controller-name/ab -> method find1a
http://localhost:3000/controller-name/aab -> method find1
Routes use param and regular expression
    @Get(':category(cat1|cat2)/:slug')
    category(@Param('category') category):string {
        return category;
    }
http://localhost:3000/controller-name/cat1/slug -> cat1
Status code
As mentioned, the response status code is always 200 by default, except for POST requests which are 201. We can easily change this behavior by adding the @HttpCode(...) decorator at a handler level.
@Post()
@HttpCode(204)
create() {
  return 'method create()';
}
Often, your status code isn’t static but depends on various factors. In that case, you can use a library-specific response (inject using @Res()) object (or, in case of an error, throw an exception).
Headers
To specify a custom response header, you can either use a @Header() decorator or a library-specific response object (and call res.header() directly).
    @Get('method1')
    @Header('Cache-Control', 'none')
    method1() {
        return 'method method1()';
    }
Redirection
To redirect a response to a specific URL, you can either use a @Redirect() decorator or a library-specific response object (and call res.redirect() directly).
@Redirect() takes a required url argument, and an optional statusCode argument. The statusCode defaults to 302 (Found) if omitted.
@Get()
@Redirect('http://tutorialspots.com', 301)
Sometimes you may want to determine the HTTP status code or the redirect URL dynamically. Do this by returning an object from the route handler method with the shape:
{
  "url": string,
  "statusCode": number
}
Returned values will override any arguments passed to the @Redirect() decorator. For example:
@Get('download')
@Redirect('http://tutorialspots.com', 302)
download(@Query('version') version) {
  if (version && version === '2') {
    return { url: 'http://tutorialspots.com/v2/' };
  }
}
Route parameters
Routes with static paths won’t work when you need to accept dynamic data as part of the request (e.g., GET /category/1 to get category with id 1). In order to define routes with parameters, we can add route parameter tokens in the path of the route to capture the dynamic value at that position in the request URL. The route parameter token in the @Get() decorator example below demonstrates this usage. Route parameters declared in this way can be accessed using the @Param() decorator, which should be added to the method signature.
@Get(':id')
findOne(@Param() params): string {
  console.log(params.id);
  return `This action returns a #${params.id} category`;
}
@Param() is used to decorate a method parameter (params in the example above), and makes the route parameters available as properties of that decorated method parameter inside the body of the method. As seen in the code above, we can access the id parameter by referencing params.id. You can also pass in a particular parameter token to the decorator, and then reference the route parameter directly by name in the method body.
@Get(':id')
findOne(@Param('id') id): string {
  return `This action returns a #${id} category`;
}
Sub-Domain Routing
The @Controller decorator can take a host option to require that the HTTP host of the incoming requests matches some specific value.
@Controller({ host: 'admin.example.com' })
export class AdminController {
  @Get()
  index(): string {
    return 'Admin page';
  }
}
WARNING
Since Fastify lacks support for nested routers, when using sub-domain routing, the (default) Express adapter should be used instead.
Similar to a route path, the hosts option can use tokens to capture the dynamic value at that position in the host name. The host parameter token in the @Controller() decorator example below demonstrates this usage. Host parameters declared in this way can be accessed using the @HostParam() decorator, which should be added to the method signature.
import { Controller, Get, HostParam } from '@nestjs/common';

@Controller({
    path: 'controller-name',
    host: ':subdomain.tutorialspots.com'
})
export class ControllerNameController {
    @Get('subdomain')
    getSubdomain(@HostParam() hostParams:any) {
        return hostParams
    }
}
http://demo1.tutorialspots.com:3000/controller-name/subdomain -> {"subdomain":"demo1"}
Scopes
For people coming from different programming language backgrounds, it might be unexpected to learn that in Nest, almost everything is shared across incoming requests. We have a connection pool to the database, singleton services with global state, etc. Remember that Node.js doesn’t follow the request/response Multi-Threaded Stateless Model in which every request is processed by a separate thread. Hence, using singleton instances is fully safe for our applications.
However, there are edge-cases when request-based lifetime of the controller may be the desired behavior, for instance per-request caching in GraphQL applications, request tracking or multi-tenancy. Learn how to control scopes here.
Asynchronicity
We love modern JavaScript and we know that data extraction is mostly asynchronous. That’s why Nest supports and works well with async functions.
Every async function has to return a Promise. This means that you can return a deferred value that Nest will be able to resolve by itself. Let’s see an example of this:
@Get()
async findAll(): Promise<any[]> {
  return [];
}
The above code is fully valid. Furthermore, Nest route handlers are even more powerful by being able to return RxJS observable streams. Nest will automatically subscribe to the source underneath and take the last emitted value (once the stream is completed).
@Get()
findAll(): Observable<any[]> {
  return of([]);
}
Both of the above approaches work and you can use whatever fits your requirements.
Request payloads
Our previous example of the POST route handler didn’t accept any client params. Let’s fix this by adding the @Body() decorator here.
But first (if you use TypeScript), we need to determine the DTO (Data Transfer Object) schema. A DTO is an object that defines how the data will be sent over the network. We could determine the DTO schema by using TypeScript interfaces, or by simple classes. Interestingly, we recommend using classes here. Why? Classes are part of the JavaScript ES6 standard, and therefore they are preserved as real entities in the compiled JavaScript. On the other hand, since TypeScript interfaces are removed during the transpilation, Nest can’t refer to them at runtime. This is important because features such as Pipes enable additional possibilities when they have access to the metatype of the variable at runtime.
Let’s create the CreateObjectDto class/interface:
CreateObject.dto.ts
export interface CreateObjectDto {
  name: string;
  age: number;
}
It has only three basic properties. Thereafter we can use the newly created DTO inside the CatsController:
controller-name.controller.ts
@Post()
async createObject(@Body() CreateObjectDto : CreateObjectDto ) {
  return 'This action adds a new Object';
}
Handling errors
There’s a separate chapter about handling errors (i.e., working with exceptions) here.
Library-specific approach
So far we’ve discussed the Nest standard way of manipulating responses. The second way of manipulating the response is to use a library-specific response object. In order to inject a particular response object, we need to use the @Res() decorator. To show the differences, let’s rewrite the ControllerNameController to the following:
import { Controller, Get, Post, Res, HttpStatus } from '@nestjs/common';
import { Response } from 'express';

@Controller('cats')
export class ControllerNameController {
  @Post()
  create(@Res() res: Response) {
    res.status(HttpStatus.CREATED).send();
  }

  @Get()
  findAll(@Res() res: Response) {
     res.status(HttpStatus.OK).json([]);
  }
}
Though this approach works, and does in fact allow for more flexibility in some ways by providing full control of the response object (headers manipulation, library-specific features, and so on), it should be used with care. In general, the approach is much less clear and does have some disadvantages. The main disadvantages are that you lose compatibility with Nest features that depend on Nest standard response handling, such as Interceptors and the @HttpCode() decorator. Also, your code can become platform-dependent (as underlying libraries may have different APIs on the response object), and harder to test (you’ll have to mock the response object, etc.).
As a result, the Nest standard approach should always be preferred when possible.
Documentation @nestjs/core
Documentation @nestjs/common
Documentation @nestjs/websockets
Documentation @nestjs/microservices
